Tuesday, 14 June 2011
Hmmm!
I think I've let my blogging slip a little. Had a virus on my computer so that didn't help but I'm back up and running now.
Here is a little taster of the first 12 x 12 cut that I created on my Gypsy and used with my Cricut Expression 2. The paper has a faint croc skin print but I've used it here to cut a range of embellishments. The frame in the top left hand corner has been made by welding four corners together, although I'll explain this in more detail in another post. This is also how I have acheived the border embellishment in the bottom of the photo.
Wednesday, 1 June 2011
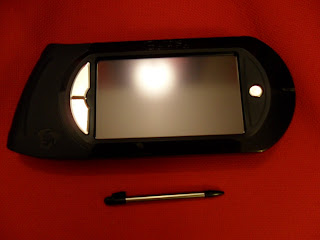
Gypsy
No creations tonight but instead a very quick introduction to the Cricut Gypsy. Although I've only had this nifty little gadget for a couple of weeks it is one of the best purchases I've ever made. There are so many features that I've only managed to try out a handful of them so far. The best has to be the weld feature which lets you merge images together into one whole image before cutting. This is how I achieved the borders in the last post. The weld feature can also be used to make shaped cards.
When you are designing your cutting layout by placing images onto the cutting mat, it is really useful to be able to position each image individually. This will help to maximise your paper.
Tuesday, 31 May 2011
Borders
A quick post tonight showing some borders made using images from various Cricut cartridges. These were made by welding images together on the Gypsy and then cut by linking to the Cricut Personal Cutter. The cartridges used were Cindy Loo and From My Kitchen. Detailed instructions coming soon!
Monday, 30 May 2011
Skyline
This was a very quick card using a skyline image from the Cricut Sampler cartridge. This cartridge came with my Cricut Personal Cutter but this is the first time I've used the image. I brayered the background using the Soothing Sunset inkpad from the Big and Juicy range. Once this had dried I mounted the image onto the brayered background using Pinflair Foto-glue. This was then mounted onto gold holographic card and finally onto orange pearlescent card. I decided on the black base card to set off the main image.
Sunday, 29 May 2011
An Introduction
This blog will focus on card making and scrapbooking design ideas using the Cricut Expression 2 by Provocraft. My goal is to publish something Cricut-related every day for a year. However, this might be a tad ambitious!
I'm quite new to the Cricut range, only purchasing my first machine at the end of last year. However, I was so blown away by the capabilities of the Cricut Personal Cutter that I just couldn't resist the Cricut Expression 2 when it was launched last week. It hasn't arrived yet but I'm trying to wait patiently! Hmmm...! I've also recently purchased the Cricut Gypsy, which will make designing my own embellishments and cards so much easier.
If you would like more information on the Cricut Expression 2 please follow this link - www.createandcraft.tv/cricut-expression-2.aspx. Information on Provocraft and the full range of Cricut products available, can be found at www.provocraft.com.
I hope you enjoy this blog and feel inspired to get creative.
Subscribe to:
Comments (Atom)


